
GCM Configuration
Push Notification helps you in sending event or alert to your app users even when they are not logged into app. App42 uses GCM (Google Cloud Messaging) to send Push Notification on Android devices. You can send push notification from UI console as well as can use APIs to send and schedule Push notification to your app users. App42 also gives you interesting insight about analytics of push messages too. To know how to send push notification in your Android App, first we need to setup Google project to get the credentials. After regestering the project on Google, you need to setup the project credentials with App42. Here are the few easy steps to for the above process:
1. Prerequisite Setup
- Register with App42 platform
- Create an app once you are on Quick-start page after registration.
- If you are already registered, login to AppHQ console and create an app from App Manager -> App Create link.
- Create a project and get your Project Id from google developer console. It would be available in Overview section of your created project.
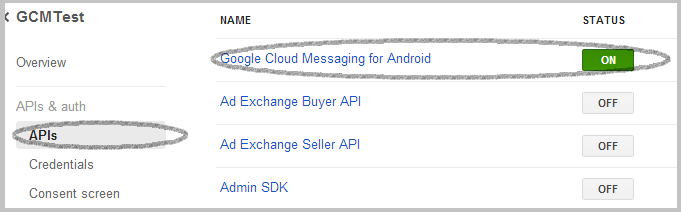
- Select your created project and click on APIs option in Google developer console and enable Google Cloud Messaging for Android service.
- Click on Credentials from left menu -> Create New Key -> Server Key.
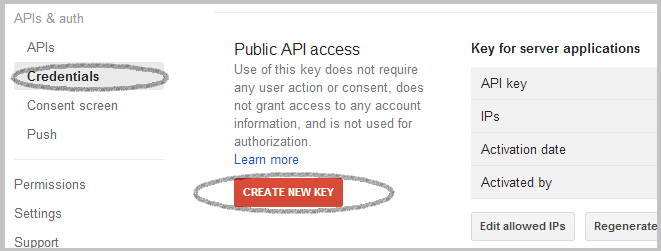
- Keep Accept requests from these server IP addresses as blank and click on Create button

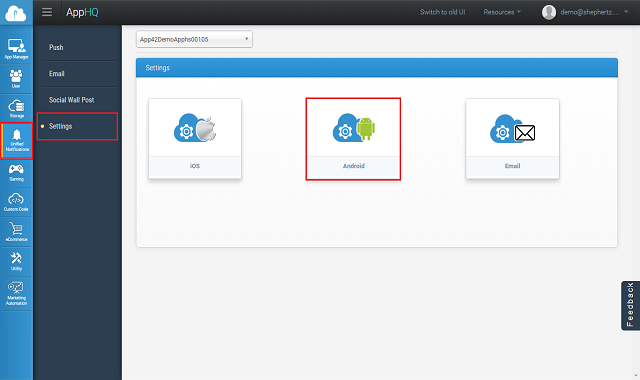
- From AppHQ Management console click on Unified Notifications and click on Settings and view Android Setting as shown in below image:
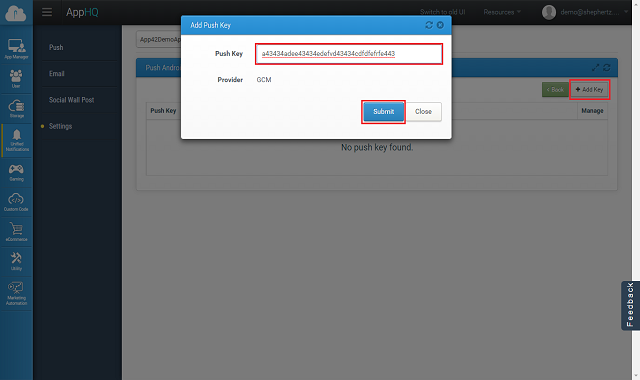
- Select your app ,Click on Add Key if you have not added, Copy your server key under push key section which is generated in Google developer console in above step and submit it.
Go to Configure and Build Project


