Digitally transforming large
Enterprises

Making AI applied for
Enterprises

Customers Want A 360 °
Omni-Channel Retail Experience.

Seamless & Connected
Omni-Channel Experience Delivered.

Comprehensive Solution to Securely Expose Protected Resources as APIs

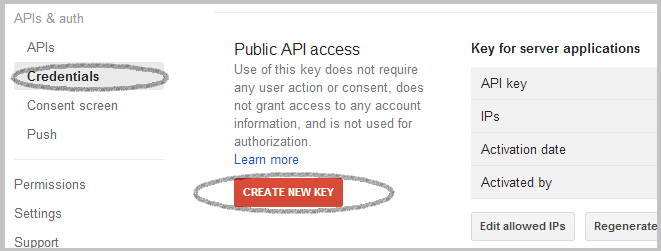
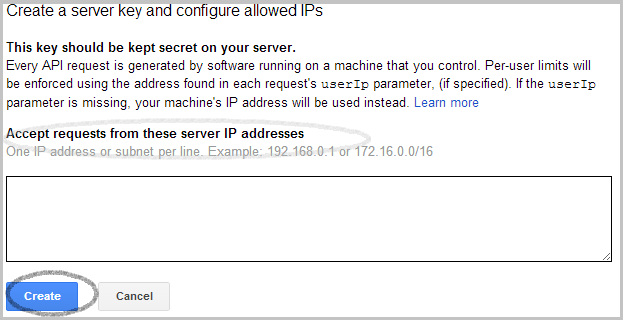
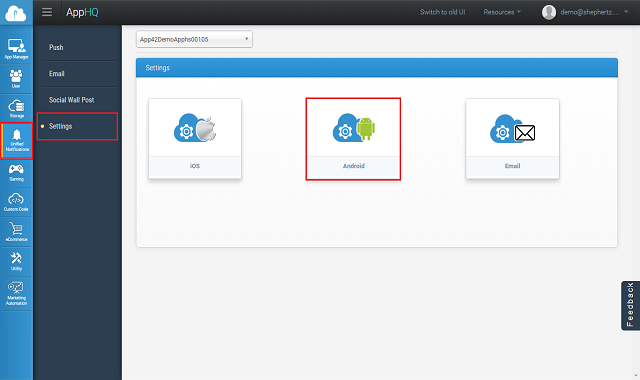
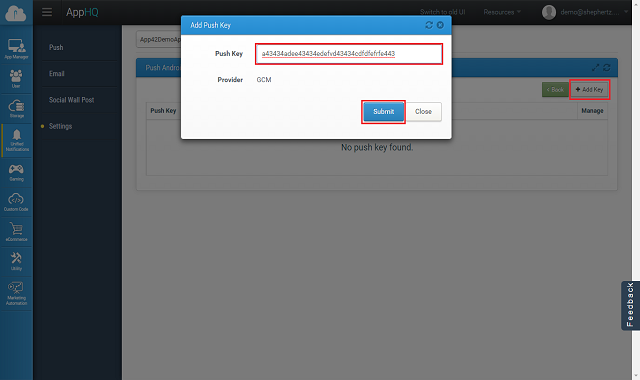
Push Notification helps you in sending event or alert to your app users even when they are not logged into app. App42 uses GCM (Google Cloud Messaging) to send Push Notification on Android devices. You can send push notification from UI console as well as can use APIs to send and schedule Push notification to your app users. App42 also gives you interesting insight about analytics of push messages too. To know how to send push notification in your Android App, first we need to setup Google project to get the credentials. After regestering the project on Google, you need to setup the project credentials with App42. Here are the few easy steps to for the above process:


