
This easy and elaborated tutorial will enable you to configure your iOS app to send and receive push notifications. App42 Cloud API provides push notifications using APNS (Apple Push Notification Services). The best part about using App42 Push for your iOS app is that you can schedule and target people with geo based push notifications as well. Along with these features, you can also track the response rate of your notifications using the detailed analytics. Let’s begin with configuring your iOS project and then the quick process to start sending push:
Here are the prerequisites to configure Push Notifications for iOS applications :
Once you have all of these, you would need to generate AppID and SSL certificate on Apple Developer portal, .p12 file and a provisioning profile configured for push notification. This guide will walk you through all the necessary steps needed to configure your application for push notification.
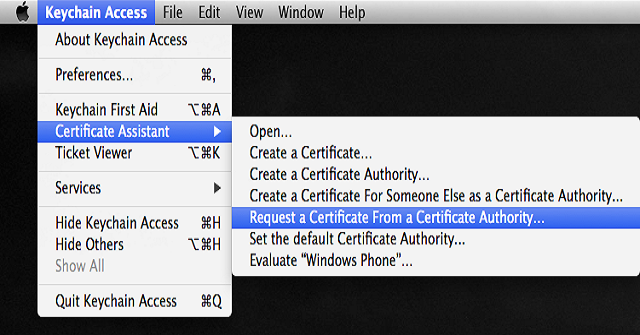
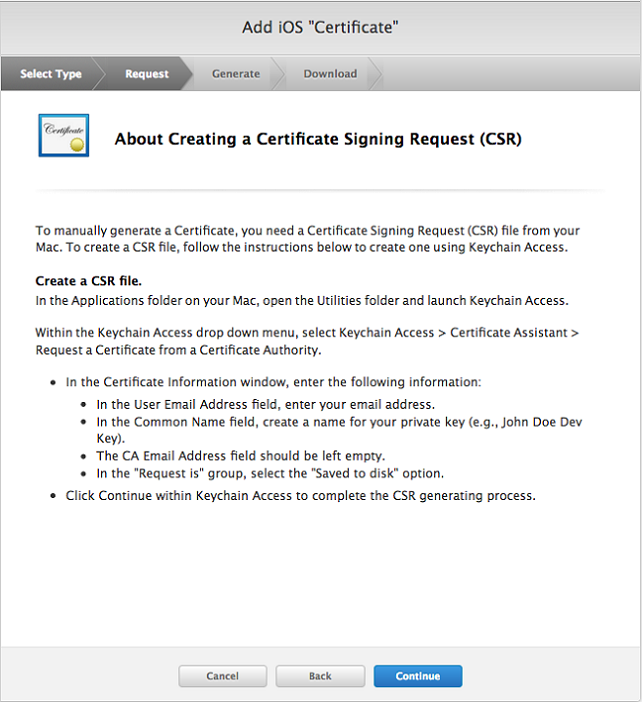
Certificate Signing Request (CSR) file would be required from your development machine to manually generate the certificate, which will allow you to authenticate the creation of SSL certificate.
Follow these simple steps to complete this process:

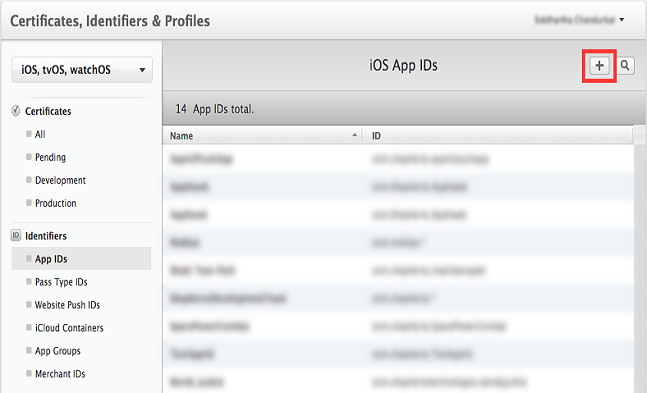
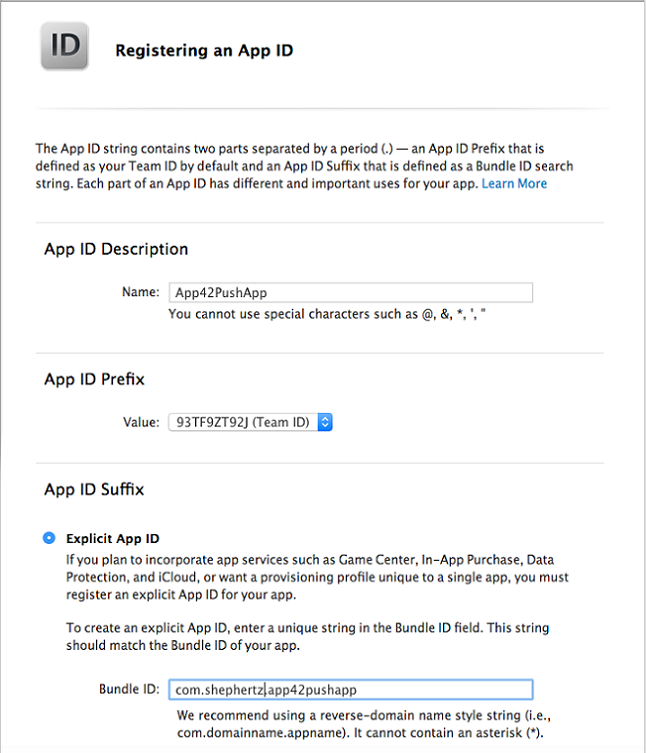
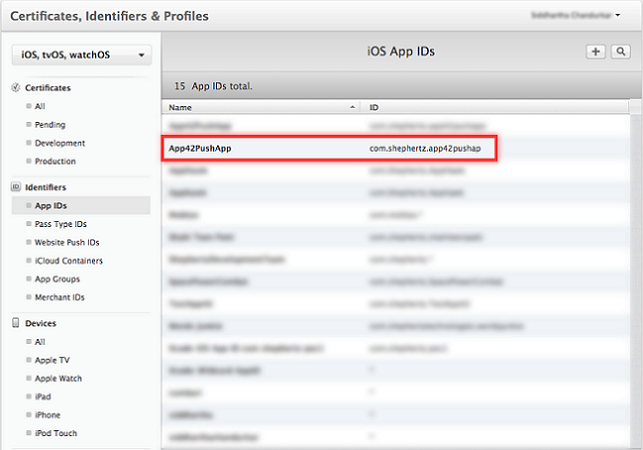
All the iOS applications installed on your development device need an App ID. If you’ve already created an App ID, you may use it without any wildcard characters. To create a new one, follow these simple steps:
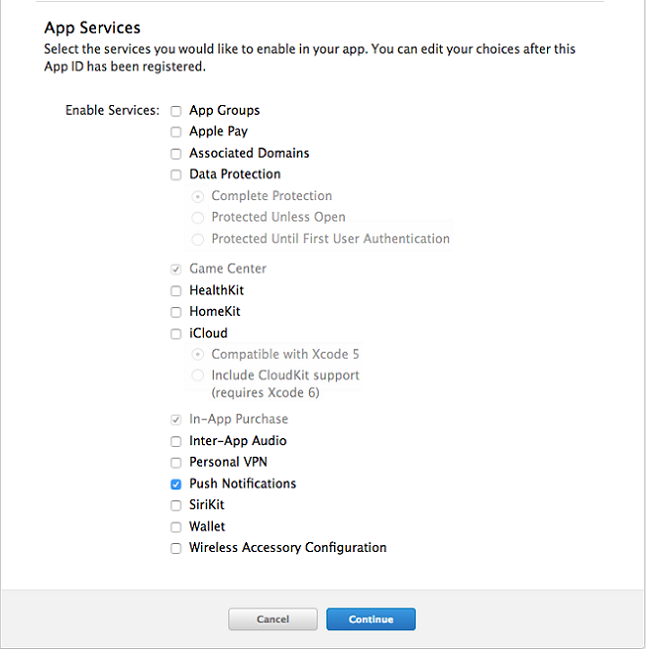
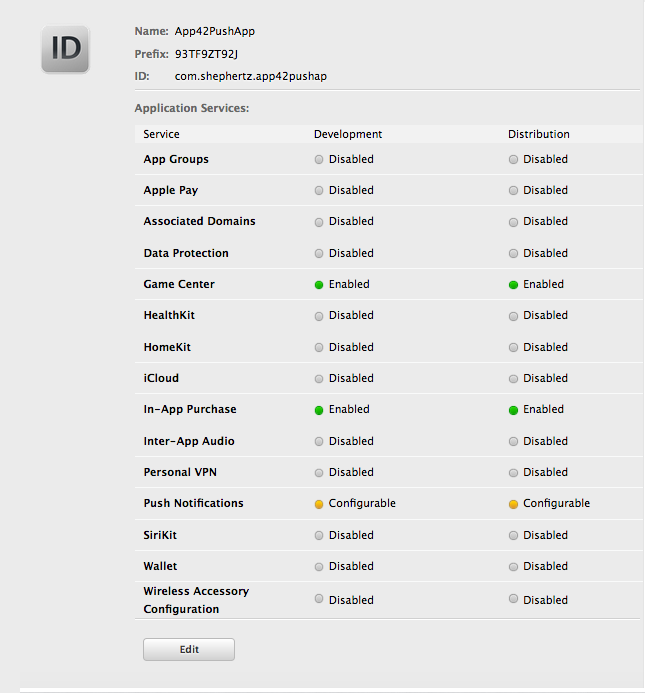
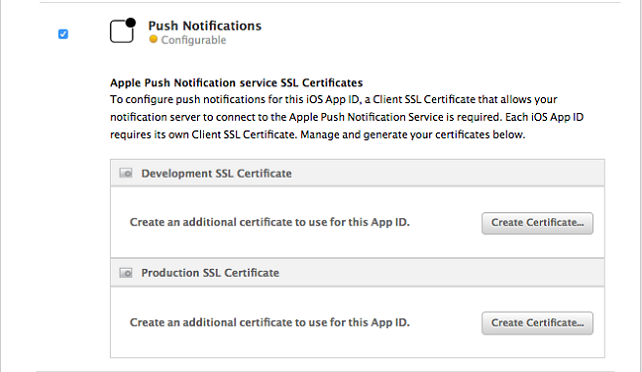
Now the next step is to generate SSL certificate to make a secure connection between App42 Push Server and APNS. This certificate will be linked to the App ID you just created so that the App42 Server will send push notifications to this particular app only.

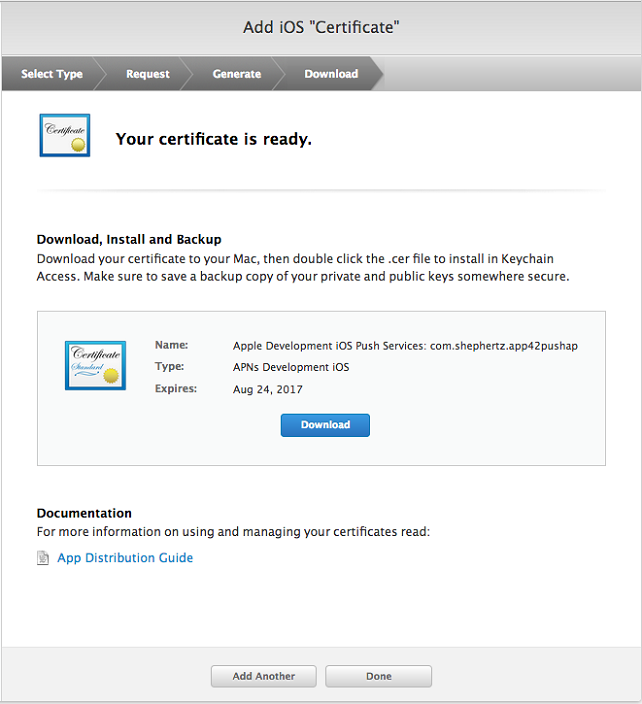
Congratulations! You have created a valid certificate for sending push notifications in the development environment, you may repeat the same process for Production.
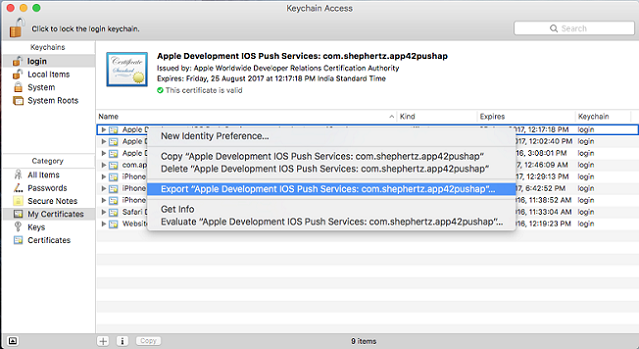
a. Keep your .cer file and .p12 file in a single folder
b. Open the terminal and go to the folder having both these files $ cd “your folder path”
c. Now execute the following commands in the terminal:
openssl x509 -in aps_development.cer -inform DER -out developer_identity.pem -outform PEM
openssl pkcs12 -nocerts -in App42PushDevKey.p12 -out App42PushDevKey.pem
openssl pkcs12 -export -inkey App42PushDevKey.pem -in developer_identity.pem -out iphone_dev.p12
Where, aps_development.cer <= SSL Certificate you downloaded from Apple in Step 3 and App42PushDevKey.p12 <= The .p12 file you just created above.
Select Provisioning Profile option from the sidebar under Certificates, Identifiers & Profiles on iOS Dev Center and select + button as shown below
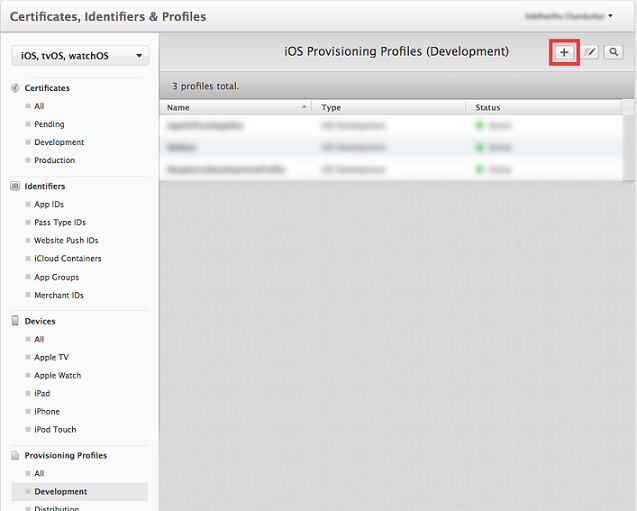
Now, follow the 4-step Add iOS Provisioning Profile wizard to create the provisioning profile
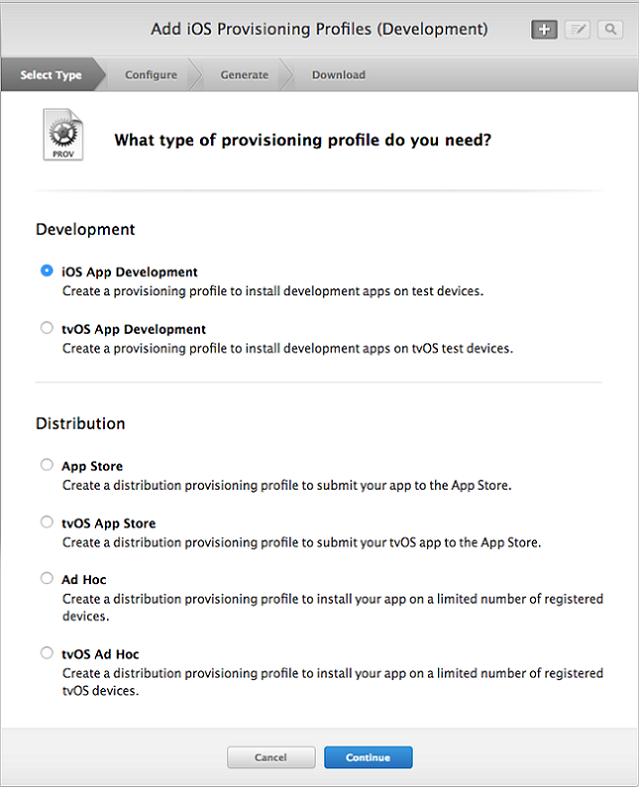
Step-1 : Select Type
Select iOS App Development under Development and then click Continue
Step-2 : Configure
Select the App ID created section-2 of this tutorial and click on Continue

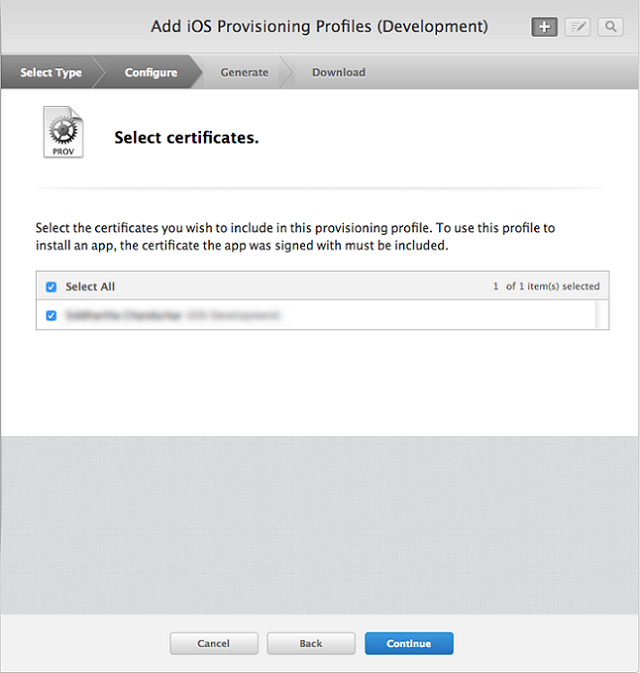
Step-2.1 Select Certificates :
Select the certificates from the list provided to include in this provisional profile and click on Continue
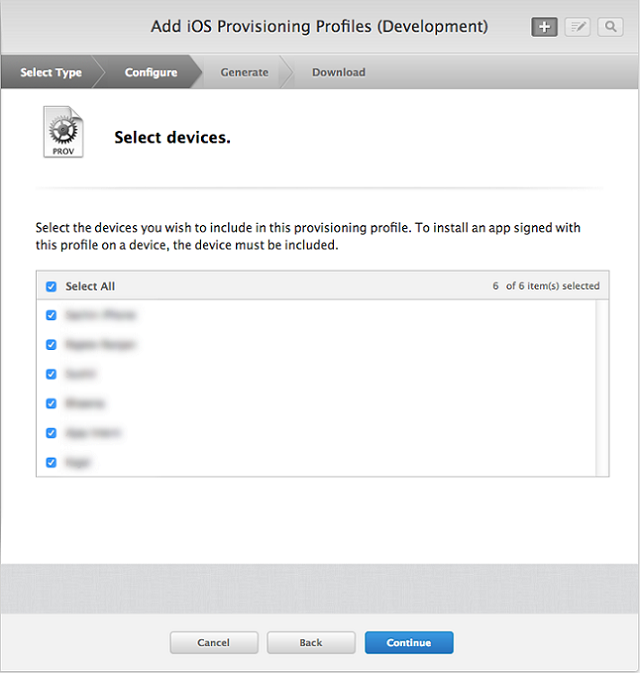
Step-2.2 Select Devices :
Select the devices you wish to include in this provisioning profile and click on Continue
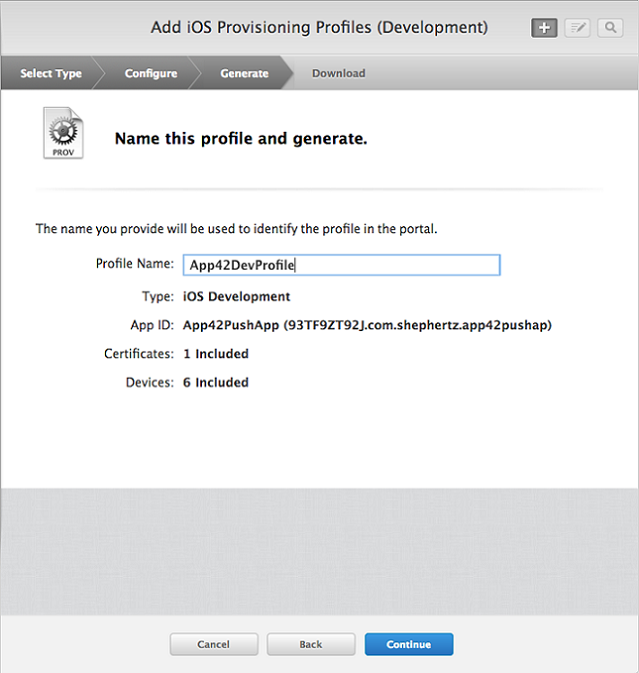
Step-3 : Generate
Enter a meaningful name for this provisioning profile in field Profile Name. This will be used to identify the profile in the portal. Now click on Generate
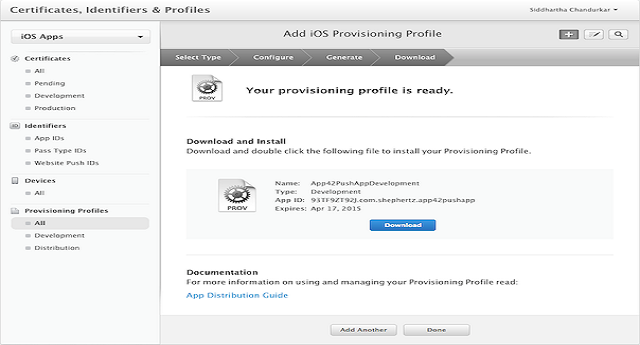
Step-4 : Download
Select Download to get the generated profile. Add the profile to Xcode by double clicking on it and that is it
Note:- Repeat the process to generate the Ad Hoc App Store profile, the only difference is, select the Select Type as Ad Hoc / App Store instead of Development in the Step-1.
To send Push Notifications using App42 Cloud API, you have to upload the iphone_dev.p12 file, that you created in step-4, in the AppHQ Console.
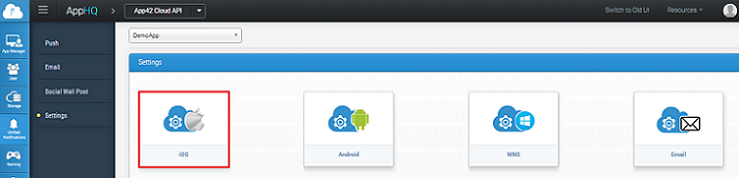

Repeat the same process to configure App42 Cloud API App for Push when it is ready for distribution, the exception would be selecting Production environment during the process.
Note:- Environment drop down menu has two options - development and production. You can upload two .p12 files one for each environment, but we recommend to have only one active push profile at a time.
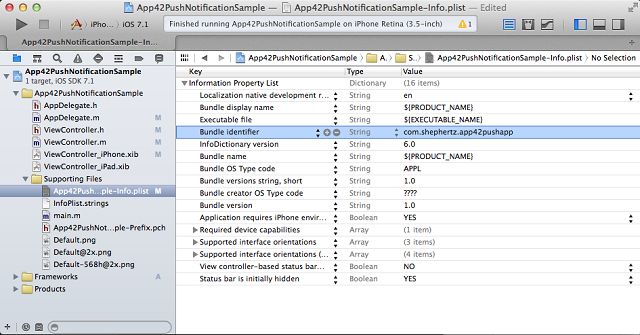
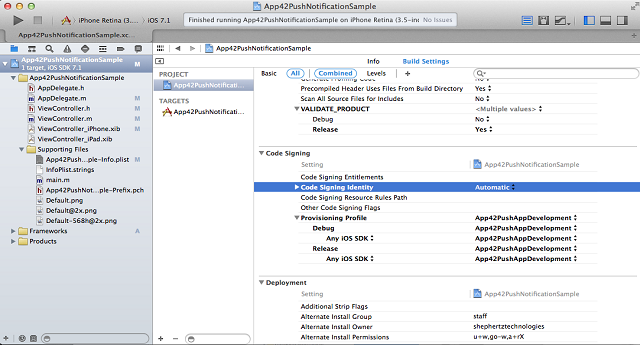
Xcode settings to enable iOS Application for Push Notifications:
Registering the Device for Push:
Navigate to the AppDelegate.m class and change the application:didFinishLaunchingWithOptions: method to look like this:
- (BOOL)application:(UIApplication *)application didFinishLaunchingWithOptions:(NSDictionary *)launchOptions

{
	// Intitializing App42API
	[App42API initializeWithAPIKey:@"API_KEY" andSecretKey:@"SECRET_KEY"];
    // Let the device know we want to receive push notifications
    // Register for Push Notitications, if running on iOS 8
    if ([application respondsToSelector:@selector(registerUserNotificationSettings:)])
    {
        UIUserNotificationType userNotificationTypes = (UIUserNotificationTypeAlert | UIUserNotificationTypeBadge | UIUserNotificationTypeSound);
        UIUserNotificationSettings *settings = [UIUserNotificationSettings settingsForTypes:userNotificationTypes categories:nil];
        [application registerUserNotificationSettings:settings];
        [application registerForRemoteNotifications];
    }
    else
    {
        // Register for Push Notifications, if running iOS version < 8
        [application registerForRemoteNotificationTypes:(UIRemoteNotificationTypeBadge | UIRemoteNotificationTypeAlert | UIRemoteNotificationTypeSound)];
    }
    return YES;
}
The above code tells the OS that this particular app wants to receive push notifications.
Now add the following delegate method in the AppDelegate.m class, which will be called in case of successful and failed registration.
-(void)application:(UIApplication*)application didRegisterForRemoteNotificationsWithDeviceToken:(NSData*)deviceToken
{
   // Prepare the Device Token for Registration (remove spaces and < >)
   NSString *devToken = [[[[deviceToken description]
		stringByReplacingOccurrencesOfString:@"<"withString:@""]
		stringByReplacingOccurrencesOfString:@">" withString:@""]
		stringByReplacingOccurrencesOfString: @" " withString: @""];
	NSLog(@"My token is: %@", devToken);
}
-(void)application:(UIApplication*)application didFailToRegisterForRemoteNotificationsWithError:(NSError*)error

{
   NSLog(@"Failed to get token, error: %@", error);
}
When your app registers for the remote (push) notifications, it tries to obtain a device token. A device token is the address which a push notification will be delivered to.
Registering the device with App42 Push Server:
After getting the device token you would have to register your device with the App42 Server to set up a connection with APNS to send push notification to this particular device token. Change the delegate method application:didRegisterForRemoteNotificationsWithDeviceToken: in the AppDelegate.m class and it should look like this:
-(void)application:(UIApplication*)application didRegisterForRemoteNotificationsWithDeviceToken:(NSData*)deviceToken
{
    // Prepare the Device Token for Registration (remove spaces and < >)
	NSString *devToken = [[[[deviceToken description]
		stringByReplacingOccurrencesOfString:@"<"withString:@""]
		stringByReplacingOccurrencesOfString:@">" withString:@""]
		stringByReplacingOccurrencesOfString: @" " withString: @""];
    NSLog(@"My token is: %@", devToken);
/** Register the device token for App42 Push notification services**/
    [self registerUserForPushNotificationToApp42Cloud:devToken];
}

-(void)registerUserForPushNotificationToApp42Cloud:(NSString*)deviceToken
{
    PushNotificationService *pushObj=[App42API buildPushService];
    @try
    {
        PushNotification *pushNotification=[pushObj registerDeviceToken:deviceToken withUser:@"User Name"];
        [pushNotification release];
    }

    @catch (App42Exception *exception)
    {
        NSLog(@"%@",exception.reason);
    }
    @finally
    {
        [pushObj release];
    }
}
Sending Push Notifications:
The push notifications can be sent from the iOS app as well as from the AppHQ console.
Sending Push from your iOS App:
Call the following method in a commonly used class in your project so that you can call the any time you prefer to:
-(void)sendPush:(NSString*)message toUser:(NSString*)userName
{
    @try
    {
        NSMutableDictionary *dictionary = [NSMutableDictionary dictionary];
        [dictionary setObject:message forKey:@"alert"];
        [dictionary setObject:@"default" forKey:@"sound"];
        [dictionary setObject:[NSNumber numberWithInt:1] forKey:@"badge"];
        PushNotificationService *pushObj=[App42API buildPushService];
        PushNotification *push = [pushObj sendPushMessageToUser:userName withMessageDictionary:dictionary];
        [pushObj release];
    }
    @catch (App42Exception *exception)
    {
        NSLog(@"Reason = %@",exception.reason);
    }
    @finally
    {
    }
}
Note:- To increment badge automatically whenever the message is received, send “increment” as a value for key “badge” in the above message dictionary.
In the sample, we have written this method inside the ViewController.m.
The above method implements App42 PushNotificationService API sendPushMessageToUser to send a Push notification to a specific user. Simplarly, App42 PushNotificationService has several APIs that enable you to send as many push notifications as you want.
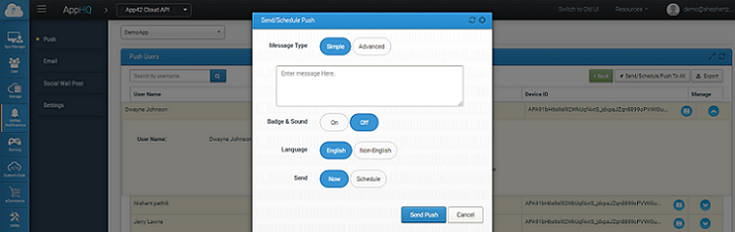
Sending Push from the AppHQ Console:
To send Push notifications from AppHQ Console, simply login and select Users under Unified Notifications > Push in AppHQ left side Menu

Handling Push Notifications After Receiving:
If you want to take any action after you receive the push notification then you would need to add the following method in the AppDelegate.m class:
- (void)application:(UIApplication *)application didReceiveRemoteNotification:(NSDictionary *)userInfo
{
       NSLog(@"%s..userInfo=%@",__FUNCTION__,userInfo);
      /**
       * Dump your code here according to your requirement after receiving push
       */
}
Sending Messages from Server Side/other SDKs with Sound and Badge Effect
In case you want to send push notifications with sound and badge effects on iOS devices, you would have to pass JSON string in the following format using JAVA SDK. Similarly, you can use other server side SDKs as well to achieve this.
PushnotificationService pushnotificationService = App42API.buildPushnotificationService();
String userName = "Nick";
//Message format for iOS device with sound and badge
String message = "{'alert':'Hi There...','badge':1,'sound':'default'}";
PushNotification pushNotification = pushNotificationService.sendPushMessageToUser(userName,message);
You may also achieve this through AppHQ by putting this JSON format in the message text area for sending messages to iOS devices with sound and badge effects.
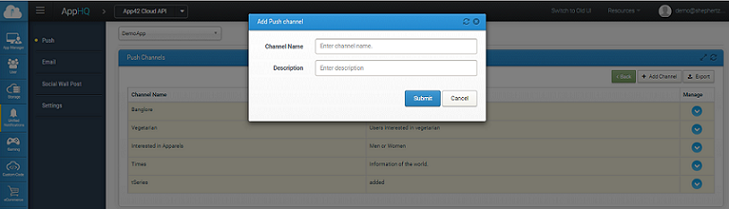
Sending Message to a Channel
App42 Push also supports the channel subscription model where user can subscribe to a channel of their interest to receive the notifications of that particular channel. You can send messages to that channel so that all the users who are subscribed to that channel will get that notification. A channel can be created in the AppHQ console. Simply follow these steps:
Once channel is created you may ask users to subscribe to that channel. Please use the following code snipped to do this:
-(void)subscribeChannel:(NSString*)channelName toUser:(NSString*)userName
{
    @try
    {
        PushNotificationService *pushObj=[App42API buildPushService];
        [pushObj subscribeToChannel:channelName userName:userName deviceToken:deviceToken deviceType:@"iOS"];
        [pushObj release];
    }
    @catch (App42Exception *exception)
    {
        NSLog(@"Reason = %@",exception.reason);
    }
    @finally
    {
    }
}

-(void)sendPush:(NSString*)message toChannel:(NSString*)channelName

{
    @try
    {
        NSMutableDictionary *dictionary = [NSMutableDictionary dictionary];
        [dictionary setObject:message forKey:@"alert"];
        [dictionary setObject:@"default" forKey:@"sound"];
        [dictionary setObject:@"2" forKey:@"badge"];
        PushNotificationService *pushObj=[App42API buildPushService];
        [pushObj sendPushMessageToChannel:channelName withMessageDictionary:dictionary];
        [pushObj release];
    }
    @catch (App42Exception *exception)
    {
        NSLog(@"Reason = %@",exception.reason);
    }

    @finally
    {
    }
}
Scheduling Message to a User
You can also schedule messages for your app users so that they receive it in future on a specified time. Here are the steps for the same:

Scheduling message to a Channel
Message scheduling for any channel can be done in similar way. Follow these simple steps:
Push notification is initially shot from the App42 server to APNS, and then is sent to the devices. There is no guarantee that your push will get delivered, hence it is stated as a best effort. Once it is delivered on user device, there might be a chance that user clears it without actually opening the message. Using App42 Push Analytics, you can track how many push notification was sent from your side, and how many were opened by the user. You can see these analytics from AppHQ console which will give a better insight of push notification campaign. If you want to track push message read/opened event you have to simply put following snippet after Message is clicked and lands to your app. This will enable tracking of push message and analytics can be seen from AppHQ console.
    @try
    {
        LogService *logService = [App42API buildLogService];
        [logService setEventWithName:@"Opened" forModule:@"Message"];
        [logService release];
    }
    @catch (App42Exception *exception)
    {
        NSLog(@"Description=%@",exception.reason);
    }
By registering your application with App42 you are automatically empowered to send multilingual(UTF-8) push messages to your app user using the following code snippet from any of the App42 SDKs
NSString *message = @"Nick";
NSString *userName = @"Message which you have to send";
NSMutableDictionary *dict = [NSMutableDictionary dictionaryWithObjectsAndKeys:@"true",@"dataEncoding", nil];
[pushNotificationService setOtherMetaHeaders:dict];
PushNotification *pushNotification = [pushNotificationService sendPushMessageToUser:userName message:message];
NSLog(@"Message=%@",pushNotification.message);
NSLog(@"UserName=%@",pushNotification.userName);
NSLog(@"Expiry=%@",pushNotification.expiry);
For more details and advanced features, please check out the Push Notification Documentation.


